
Cover Button Sets and Cover Button DIY Kits are 10% OFF
No Coupon Necessary
Time to Stock Up!
1 Coupon Per Order. Good Through February 28, 2021.
© ILikeBigButtons.com and I Like Big Buttons Blog, 2021.
1 Coupon Per Order. Good Through February 28, 2021.
© ILikeBigButtons.com and I Like Big Buttons Blog, 2021.

We love our Cover Buttons! Easy to make and versatile they are one of my favorite go-to craft supplies.
We carry them in 7 great sizes. The second smallest, Size 24 (5/8″), is just slightly larger in diameter than a Skittle or M&M and available in both Wire Back (sewable) and Flat Back (glueable).


Cover Button Sets and Cover Button DIY Kits are 10% OFF | No Coupon Necessary
Size 24 Cover Buttons are great for smaller projects:
Lace & Fabric Cover Button Earrings

Fabric Cover Button Mini Clothespins

Fabric Cover Button Bobby Pins

Fabric Cover Buttons for your favorite outfit


© ILikeBigButtons.com and I Like Big Buttons Blog, 2020.

These aren’t your grandma’s Cover Buttons!!! Well, actually they are 😉 only better, with so many many great uses for them.
Flat Backs are used for crafts where you would like to glue a cover button: jewelry, bracelets, rings, earrings, necklaces, bobby pins and barrettes, scrapbooking, and much more.
Wire Backs are used for fabric cover buttons in sewing, shoes, clothing, ponytail holders and much, much more.
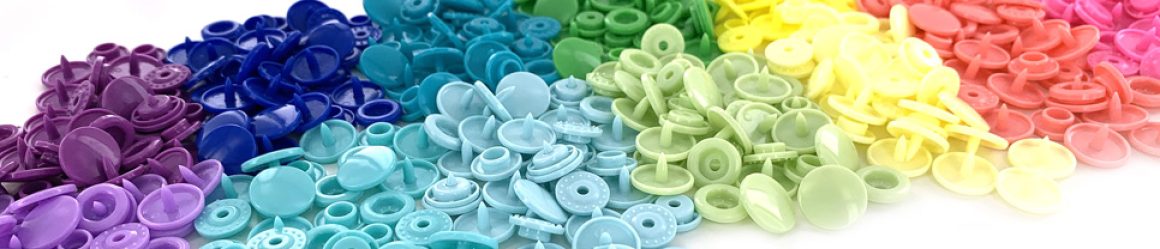
Here are the 7 sizes we carry. From 1/2″, which is about as small as your pinky nail, all the way up to 1 7/8″ in diameter, about the size of the round side of a kiwi fruit. We carry them in both flat back (glueable) and wire back (sewable).
Assembling fabric Cover Buttons is fast and simple. In just seconds, you will have a button ready for your latest craft project.
See our pictorial below:

Cover Buttons are easy to assemble:
© ILikeBigButtons.com and I Like Big Buttons Blog, 2020.

Time to Stock Up!
1 Coupon Per Order. Good Through February 29, 2020.
![]()
We have had a lot of requests for DIY Starter Kits for our most popular supplies. We have compiled our customers’ favorite craft findings and supplies into great Starter Kits. Check them out!

We have assembled several Cover Button kits with our customer’s favorite supplies. Jumbo Paper Clips, Pendant Bezels, Thumb Tacks, Jewelry Supplies, Bobby Pins, Snap Barrettes, and Badge Reels. Choose from 3 Cover Button sizes and a variety of finishes/colors. Everything that you need to get started (fabric and glue not included *).

We have also put together ready-to-go Key Fob Starter Kits with Pliers in a mix of sizes, finishes, or both. Everything that you need to get started (fabric not included *).

© ILikeBigButtons.com and I Like Big Buttons Blog, 2019.

I recently had a customer, Annie, ask if Cover Buttons could be wrapped in paper. I knew of a few customers who had success doing so but had never attempted it myself. Here is a tutorial on how to make Paper Wrapped Cover Buttons and some tips that Annie and I discovered and used.
I love how they turned out. Being an avid reader, I think they are the perfect touch for that special bookworm in your life.


Cover Buttons are easy to assemble:
1. Cut your paper scrap. You will want a circle that is about twice the diameter of your button blank. We used book pages, children’s books, and scrapbook paper and they all worked great. You may need to experiment and find what works best for you.
2. Cut a square of wax paper or piece of parchment paper slightly larger than your paper circle. You should be able to reuse it a number of times. I found that the parchment paper held up best.
3. Mist your paper circle on both sides and blot dry. This will help the paper to mold more smoothly to the rounded surface of the cover button front.

4. Layer the wax/parchment paper, then your paper circle on the larger assembly tool mold piece (RIGHT SIDE DOWN). When you look into the underside of the tool you want to see the back of the fabric.
5. Place the button front (the domed piece) on top of the paper and press into the mold. This will require firm pressure. Leave the paper edges hanging out.
6. Press the paper edges down into the backside of the button front.

7. Place the back cover button piece on top of your paper and button front. If the cover button will be subject to repeated tugging from the back, you may want to add a little e6000 adhesive before attaching the back.
8. Take the smaller piece of the assembly tool and with the open side down place it on the button back.
9. Press down firmly. You may hear a pop when the last bit of the button back slips into place. If you take the tool out and the button is not completely secured, just put it back in and press down again.
10. When you take the small assembly tool piece off, the paper edges will be secured underneath the button back.

11. Remove the button from the larger assembly tool piece carefully using the wax/parchment paper to ease the button free.


12. If desired, you can clear coat the completed button with Modge Podge or some equivalent sealer. It will extend the life of the Paper Wrapped Cover Button and give it a glossy finish.


13. Tada! I am particularly in love with the Word Cover Buttons, it was fun picking the words I wanted centered and highlighted.
© ILikeBigButtons.com and I Like Big Buttons Blog, 2019.
These aren’t your grandma’s Cover Buttons!!! Well, actually they are 😉 only better, with so many many great uses for them.
Flat Backs are used for crafts where you would like to glue a cover button: jewelry, bracelets, rings, earrings, necklaces, bobby pins and barrettes, scrapbooking, and much more.
Wire Backs are used for fabric cover buttons in sewing, shoes, clothing, ponytail holders and much, much more.
Here are the 7 sizes we carry. From 1/2″, which is about as small as your pinky nail, all the way up to 1 7/8″ in diameter, about the size of the round side of a kiwi fruit. We carry them in both flat back (glueable) and wire back (sewable).
Assembling fabric Cover Buttons is fast and simple. In just seconds, you will have a button ready for your latest craft project.
See our pictorial below:
Cover Buttons are easy to assemble:
© ILikeBigButtons.com and I Like Big Buttons Blog, 2018.

Gift Idea #12:
For the girls in your life, Fabric Cover Button Barrettes and Bobby Pins are simple to make with lots of impact.
Supplies:

Supplies:

#ilikebigbuttons #shopilikebigbuttons #coverbuttons #fabriccoverbuttons #bobbypins #barrettes #metalfindings #coverbuttonbarrettes #coverbuttonbobbypins #christmasidea #gift #christmasgift
© ILikeBigButtons.com and I Like Big Buttons Blog, 2017.

BLACK FRIDAY is here early!!! Before we prepare to celebrate another amazing Thanksgiving with our family, I wanted to give all of you our Black Friday Deals so you can get started with some great Christmas crafts or for you pre-planners 😉 some last minute projects.
Coupon Codes (Good through the end of the November 11/30/17 on our website):
BLKFRI5 for 5% off of orders over $25
BLKFRI7 for 7% off of orders over $50
BLKFRI10 for 10% off of orders over $100
BLKFRI15 for 15% off of orders over $200
***BONUS: Don’t forget that US orders over $70 also get upgraded to free shipping!!!
Happy Thanksgiving from our family to yours!!! Have a great crafty holiday week!!!
I Like Big Buttons! and All Buttons big and small 🙂


© ILikeBigButtons.com and I Like Big Buttons Blog, 2017.

Fabric Cover Button Pendants are simple to make and add a stylish twist to any outfit. My oldest and I made some simple Cover Button Pendants for her to share with her dearest friends. We integrated her school colors into the design. We are in love with how they turned out. Can’t wait to hear how her friends react!!!
We carry Pendant Bezel Trays in 23 mm (Size 36) and 38 mm (Size 60). They are available in three finishes: Silver, Antique Brass, and Gunmetal. We chose Size 60 for our project.
First Step:
Assembling fabric Cover Buttons is fast and simple. In just seconds, you will have a button ready for your latest craft project.
See our pictorial below:
Cover Buttons are easy to assemble:
*The only addendum to the above instructions was that we cut out small 3/4″ red felt hearts to sandwich between each piece of lace and fabric. You will want to do this before placing the fabric upside down on the tool. Once you press the button cap into place, you can flip our translucent tool over and make sure the heart is placed where you want it.

Step 2:

© ILikeBigButtons.com and I Like Big Buttons Blog, 2017.
